Easy DIY Thieves Hand Sanitizer Spray

Dirty Hands

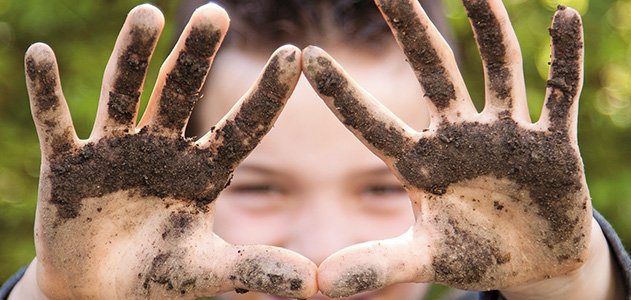
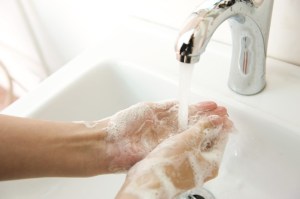
Life is messy, right? And lets be honest here, some of the best things in life get our hands dirty ~ petting animals, playing in mud puddles, digging in a garden, and heck, even cooking gets our hands dirty. While I personally still believe that a good old-fashioned hand-washing with soap and water is best, it’s not always practical. Especially if our hands have no visible dirt on them.

Washing Hands

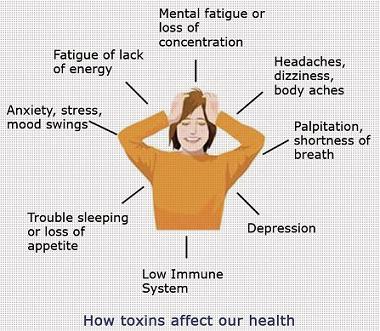
Not only is life messy, but it’s also germy. Even hands that look clean, may be covered in germs. We can come into contact with germs outside and inside. Not all germs are harmful, but some are extremely dangerous, and since we can’t see them, it’s best to just be safe about it, and sanitize those hands!

Hand Germs

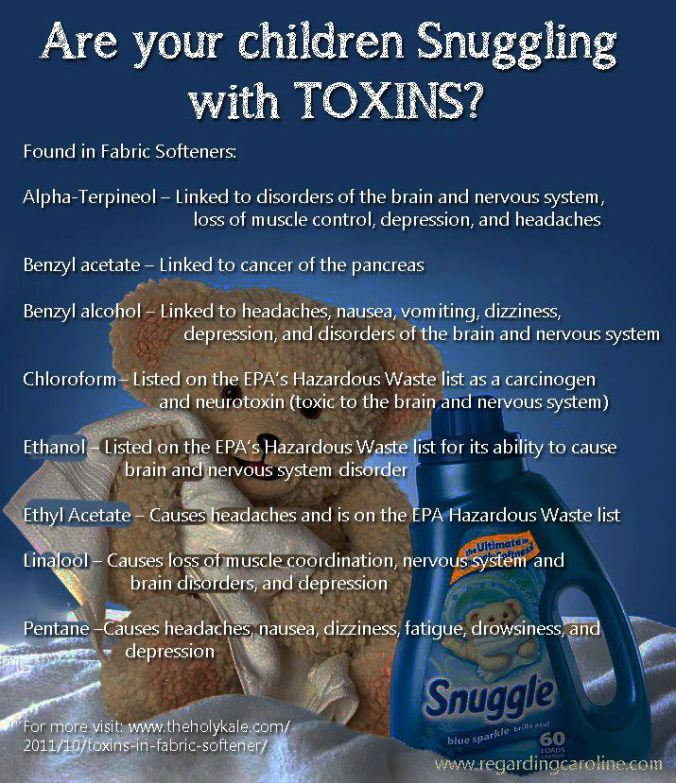
And speaking of safe, normal, commercialized hand sanitizer isn’t all that safe. Sure, it will kill germs, but not without adding a bunch of unnecessary and potentially harmful chemicals. Yuck, who wants that?

One of the common chemicals found in commercial hand sanitizer is triclosan ~ an antibiotic compound that actually builds up a resistance to antibiotics that making the bacteria you’re trying to kill even stronger. It kills the good bacteria that usually kills the bad bacteria, which lowers your resistance to disease. Other problems with triclosan are a weakened and compromised immune system, increased allergies and hay fever, and hormone disruption.

So what’s a mom (or person) to do? Hellooooo ~ make your own! It’s natural,  extremely easy AND inexpensive. Yay!

Thieves Spray

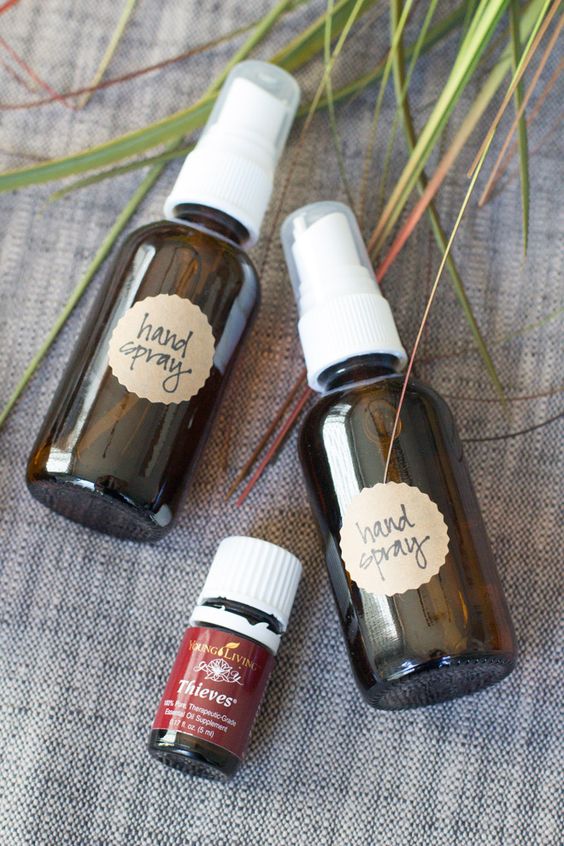
Easy DIY Thieves Thieves Hand Sanitizer Spray

What You Need:

  • 1 4oz Dark Glass Spray Bottle
  • 2 Tsp Witch Hazel
  • 20 Drops Thieves Essential Oil
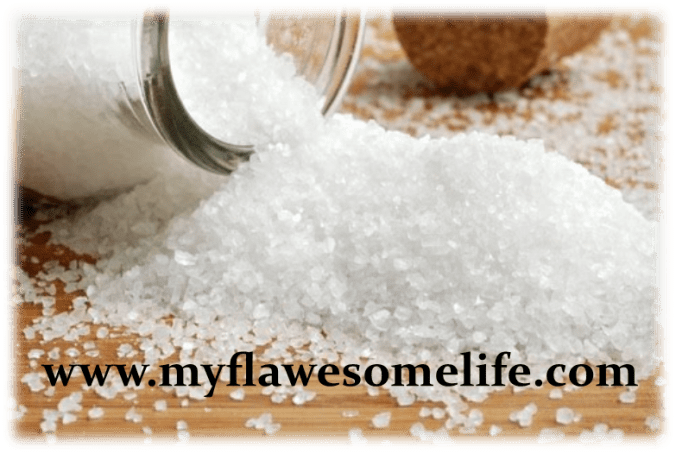
  • 1/2 Tsp Sea Salt
  • Not quite 4oz Distilled Water

How To Make:

In your clean spray bottle, first add your sea salt, then add your Thieves oil. Allow it to sit and absorb for five minutes. Then add the Witch Hazel and fill with distilled water. Put the sprayer back on the bottle, shake, and use. See? Easy-peasy!


In addition to using this spray on your hands to sanitize, you can also use it to:

  • Clean toddler/kids toys
  • Disinfect public restroom toilet seats
  • Clean airplane armrests and trays
  • Sanitize doorknobs
  • Freshen gym bags
  • Wipe down cutting boards
  • Room freshener
  • Wipe down cellphones, handbags, and steering wheels
  • Shopping carts


Note: The above recipe is for one 4oz bottle, but you can easily half the recipe for a 2oz bottle, or even keep the recipe the same and use 2 2oz bottles. 

Lemon Sugar Foot Scrub

I’m a flip-flops and sandals sort of girl ~ always have been and always will be. Of course, it helps that I live in the Southwest, where warmer weather is far more common than colder weather. However, this means that I have to pay extra~special attention to my feet, as they get dry and cracked from weather, dirt and constant exposure to the elements.

Life is Better in Flip Flops

So, what’s a girl to do? Pamper the piggies, of course! Nothing beats a good pedicure (can I get an AMEN?), but honestly, most of us probably can’t afford to get a pedicure every time our feet need a little extra attention (like weekly, if not daily)! But there is a way to give a little TLC to sore, tired, and dry tootsies… a good foot soak and/or a sugar scrub! And seriously, what piggies don’t want to be pampered?

This easy DIY lemon foot scrub offers two different types of exfoliation for dry, rough, and ravaged feet: physical and chemical. Physical exfoliation uses anything abrasive to dislodge and remove dead skin cells – in this case, sugar. Chemical exfoliation is the use of alpha hydroxy acids or beta hydroxy acids to dissolve dead skin cells and promote regeneration. Lemon juice is a great natural source of alpha hydroxy acids.

Lemon Sugar Scrub Mix

This scrub will keep for a long time in a jar. It’s a good idea to store it in a cool area out of sunlight to prevent the oils from oxidizing. It may separate over time, but if that happens, you can just give it a quick stir before you use it. No worries!

My favorite time to use it is just before I go to bed so the oils that are left on my skin can be absorbed by the skin as I sleep. I use about 1 Tablespoon of the scrub for both feet, but I like to use a lot – you can probably get away with using less.

Lemon Sugar Foot Scrub

Ingredients:

  • 1/2 cup avocado or coconut oil
  • 1 cup cane sugar
  • 1 1/2 tablespoons of lemon juice (or the juice of 1/2 a lemon)
  • 6 drops of lemon essential oil
  • 3 drops of peppermint essential oil (optional ~ I love the added cooling benefit)

Instructions:

~ Add all of the ingredients to a medium sized bowl and stir until combined.
~ If you prefer a coarser texture, you can add more sugar, 1 Tablespoon at a time.
~ If you prefer a more liquid scrub, you can do the same with avocado or coconut oil.
~ Store your finished scrub in a clean, airtight jar.

* If you prefer, you may use any other essential oil that you might like, as well as vanilla or almond extract.

Of course, this sugar scrub can be used on your hands or body too! And what did I tell ya? Easy-peasy, right?

Lemon Sugar Scrub MFL.png

Citrus Oil Bath Salts

What are bath salts and why should I use them? Great questions. Bath salts are derived from nutrients and minerals, which dissolve quickly in water and enhance your bath experience by providing not only relaxation but other health benefits as well. They aren’t necessarily salt, but merely resemble the crystals that make up common salt (for instance, Epsom Salt is actually not a salt at all, but rather a mineral compound of magnesium and sulfate). These nutrients and minerals help make your skin look smooth, eliminate impurities in your skin, draw toxins out of your body, may lower blood pressure, minimize insomnia, help treat sore and tired muscles, and treat various skin issues, like eczema, psoriasis, and general itchiness.

Bath Salts

There are many options for making bath salts. By combining different components (Epsom salt, Dead Sea Salt, Pink Himalayan Salt, baking soda, etc.) and adding essential oils, you are able to customize your product, giving you the bath experience that you prefer, or is most beneficial to you. Bath salts are naturally white in appearance, but you may add color to them if you like, by adding drops of food coloring. That is a totally personal choice (I don’t do this extra step, but many people like the color to match the scent).

This easy recipe calls for Epsom Salt and your favorite Citrus Essential Oil (Lemon, Orange, Lime, Grapefruit, Tangerine, or Citrus Fresh). That’s it! Though personally, I like to add baking soda, since it’s so good for your body’s natural pH levels (just another benefit). Citrus essential oils are high in d-limonene, naturally invigorating, and just plain smell wonderful!

Bath Salts Citrus

CITRUS OIL BATH SALTS

Ingredients:

  • 4 C Epsom Salt
  • 2 C Baking Soda
  • 15 – 20 drops of your favorite Citrus Essential Oil (Lemon, Orange, Lime, Tangerine, Citrus Fresh, Grapefruit), or any combination thereof.

Instructions:

Mix ingredients well in a nonporous bowl. Transfer into a glass jar and store in a cool, dry place. Use 1/4 ~ 1/2 cup per bath. Relax and enjoy!

What Goes On, Goes In

Have you ever heard the phrase, “What goes on your body, goes in your body?” It’s true. Our skin is our largest organ and the first line of defense against germs, pollutants, chemicals, and more. Overall, our skin does an amazing job of protecting our bodies from outside elements. But what about what we put on our bodies.

On Your Body

When it comes to personal care, many of us don’t really give much thought to what makes up our particular favorites, but we should. Personal care products (including cosmetics, deodorant, hair care, body lotions, bathing items, etc), medications, and even OTC medications are typically filled with toxic chemicals. Things that we wouldn’t dream of ingesting, we are absorbing.

The skin has approximately 3 trillion pores, and they absorb whatever we put on our skin, into our body, and into our bloodstream. Of course, it would be pretty difficult to avoid toxic chemicals altogether, but that doesn’t mean we shouldn’t be deliberate and purposeful when we can.


I am on a quest to make healthier choices for my family, going natural where possible. Part of that is using essential oils for health and wellness support, for making my own (DIY) personal care products, household cleaning, and more.

Using essential oils can radically change your life if you want them to!


7 Quick n Easy Natural DIY Beauty Hacks

I don’t know about you, but I’m all about quick and easy! Especially when it comes to my beauty regimen! Once upon a time, I could easily spend lots of time getting ready ~ for the day, to go out, and even to go to bed… but those days are long gone.

Now I’m all about efficiency and simplicity! And I’m on a journey to try to remove unnecessary chemicals and toxins from my life. So I get all excited when I find a beauty hack that makes life easier. And I figure if I get excited about it, someone else might too! With that in mind, here are 7 quick, easy, natural DIY beauty hacks to simplify your life!

7 Quick n Easy Beauty Hacks


Citrus Oil Bath Salts

Citrus Oil Bath Salts ~

Who doesn’t like a good bath? The awesome thing about this one, is that you can easily switch your essential oil to anything you like. Citrus oils are invigorating, clean and fresh. The epsom salt will draw out toxins and soothe sore, tired muscles, and general aches and pains.

  • 4 Cups Epsom Salt
  • 15 Drops Citrus Essential Oil

Mix well and store in a glass jar. Add 1/4 to 1/2 cup of mixture to your bath. Soak and relax for a minimum of 20 minutes.


Eyelash Boost

Strength and Volume Mascara Booster

Okay, so this is a great way to get added benefit from your mascara, in the simplest way possible!

We all want longer, thicker, stronger lashes, right? Of course we do, otherwise we wouldn’t use mascara at all!

Simply add 1 drop of Lavender Essential Oil and 1 drop of Cedarwood Essential Oil to your new mascara bottle. That’s it! See… Easy-Peasy!


Facial

Luxurious Homemade Facial

Ahhh… clean, glowing, nourished, and moisturized skin! Without the time and money required to go to a spa! How fantastic is this?!

Simply combine ingredients and apply to your freshly washed face. Allow mixture to stay on for 10 minutes (min), then wipe off with a very warm cloth. Tone and moisturize as normal.


Face Wash Pads

Purifying DIY Face Wash Pads

Sometimes you just need convenience when washing your face. These little pads are perfect for that. They are both gentle and deep-cleaning.

Prepare recipe as directed. To use, simply remove a pad from the jar and use to wash your face and neck. Rinse with water and follow up with your favorite toner and moisturizer. More than one pad may be required for heavier makeup.


Magic Eye Blend

Magic Eye Blend

I think it’s pretty safe to say that most of us don’t want wrinkly, crepey skin around our eyes. But good eye creams can be very expensive! And chemical-y. Yuck.

Instead, try this amazing blend. And yes, it really is amazing!

  • 2 Drops of Lemon Essential Oil
  • 2 Drops of Lavender Essential Oil
  • 2 Drops of Frankincense Essential Oil
  • 1 Oz of Fractionated Coconut Oil


Hair Spray

Non-Toxic DIY Hairspray

You need hairspray, but don’t want all the chemicals and toxins? Here’s the solution. This recipe actually works quite well.

The secret ingredient is sugar! And you can use whichever essential oils you like. Essential oils generally recommended for hair care would be Lavender, Peppermint, Rosemary, Cedarwood, Tea Tree, and Chamomile.

For faster drying of the spray, add a Tbsp of pure alcohol when mixing.


Skin Soothing Oil

Skin Soothing Oil

For dry, itchy skin from the change of seasons, swimming, frequent hot showers, and other external sources, as well as internal reasons. This oil truly is fantastic. Not only does it smell amazing, but it also works quickly at soothing, smoothing, and calming the skin.

  • 10 Drops Lavender Essential Oil
  • 10 Drops Rosemary Essential Oil
  • 4 oz Fractionated Coconut Oil or Grapeseed Oil

Apply as needed.

Easy~Peasy DIY Dryer Sheets

Did you know that fabric softener is one of the most toxic things in your home? It is.

Toxins

Many of us are waking up to the dangers of the chemicals and toxins that seem to surround us. They are literally everywhere, from the products we clean with, to the products we use for personal care, to the air that we breathe, and even the food we eat.

What about our skin though? Many people don’t realize that their skin is their largest organ. The pores on our skin allow outside elements into our body and blood stream. This is not always a bad thing ~ there are many things that are good for us that pass through. It is important to remember though, whatever we put on our skin, we put in our skin. The good and the bad. That’s not a particularly comforting thought, is it?

Toxins Affect Health

So then, what’s a health-conscious person to do? Removing chemicals and toxins from our lives can be overwhelming ~ after all, they are everywhere. It doesn’t have to be overwhelming though, meaning it doesn’t have to all be done at once. Start small, take baby steps. Every time we make a change to remove toxins, we are better off than we were before. One easy way to start is ditching the fabric softener and dryer sheets.

How bad are fabric softener and dryer sheets? Well, this for starters:

Fabric Softener Toxins

If you want more information, I recommend checking this out.

The good news is that these items are easy to replace, naturally! I haven’t used fabric softener or commercial dryer sheets for years. Instead, I use dryer balls (to expedite the drying process) and my own easy-peasy DIY dryer sheets.

DIY Dryer Sheets

Making your own dryer sheets is incredibly easy. They’re customizable. And it saves money!

Supplies:

  1. Glass jar with lid
  2. Cloth strips (I used 3 old t-shirts, as they don’t collect lint).
  3. 1 1/2 C vinegar
  4. 1/2 C water
  5. 20 drops of your favorite essential oils ((Lemon, Lavender, Tangerine, Purification, Rosemary, Thieves, etc. Any single or combo you like.)

Directions:

First, you want to cut your cloth into strips (old towels, t-shirts, microfiber cloths, whatever). Then mix the vinegar, water, and essential oils together in your glass jar. Add your cloth strips (sideways, so all strips are exposed to the mixture from one end) and seal lid. Allow to sit for a few hours, while the strips absorb all of the moisture.

To use, simply grab 2 strips and toss into the dryer. Collect your cloth strips after removing from the dryer and set aside to be used again when needed. Easy~peasy!

Dryer Sheets


Why Do They Work?

  • Vinegar is a natural softener and a natural static reducer.  And your clothes won’t smell vinegar-y when they come out … I promise.
  • Your ‘personalized, customizable’ scent of Essential Oils will give your clothes a very subtle (and all natural) scent.  One that’s all your own and not overwhelming.

These DIY dryer sheets are easy, economical, healthful, customizable, and smell pleasant. You want to do this. Trust me.